Blocking Spaces
Admins can use the Block Meeting Space feature in Ordinate to reserve a space for a future requirement or mark a space as unavailable for a period of time. This ensures that no other meetings can be scheduled in the blocked space, helping manage room availability.
Creating a Block
To block a space:
- Go to the Meeting Calendar view.
- Under the New Meeting dropdown, select Block Meeting Space.
- Specify the space to block, along with the date and time range for the block.
- Optionally, you can provide some text as a label to give a reason for the block (e.g., maintenance, reserved for VIP).
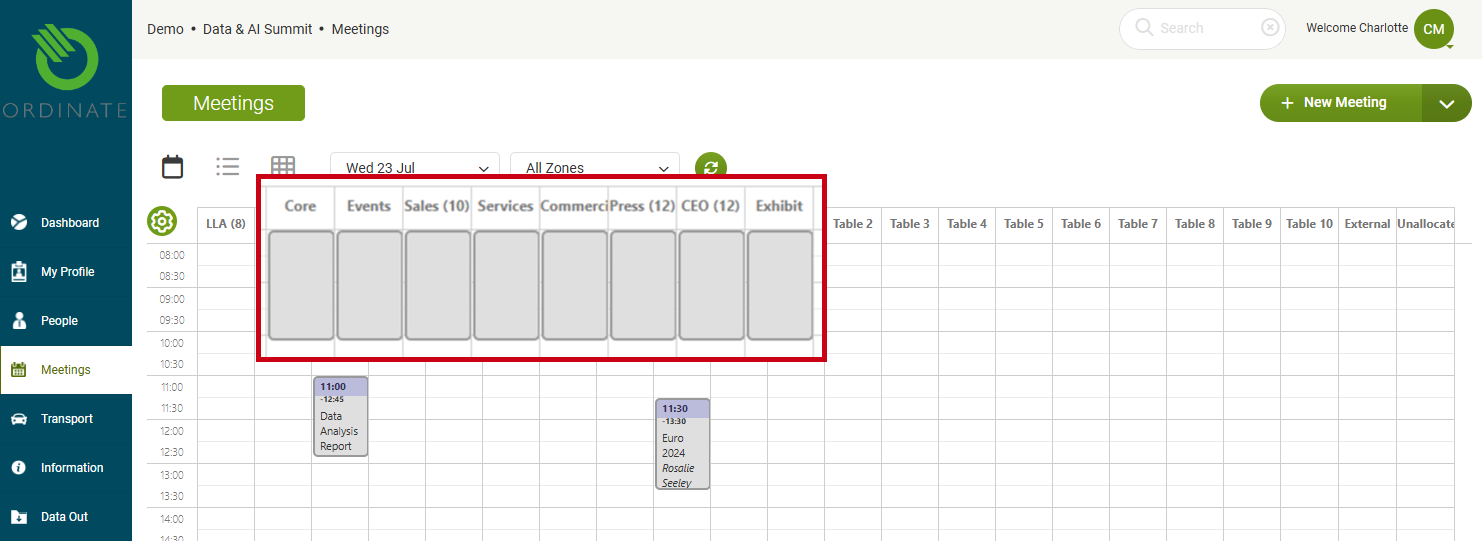
The blocked space will appear on the calendar like a meeting but with key differences:
- The block cannot be moved or dragged once created.
- There is no meeting listed in the List View, but the block prevents meetings from being created during that time.
(Screenshot placeholder: Blocked space on the calendar view)
Editing or Deleting a Block
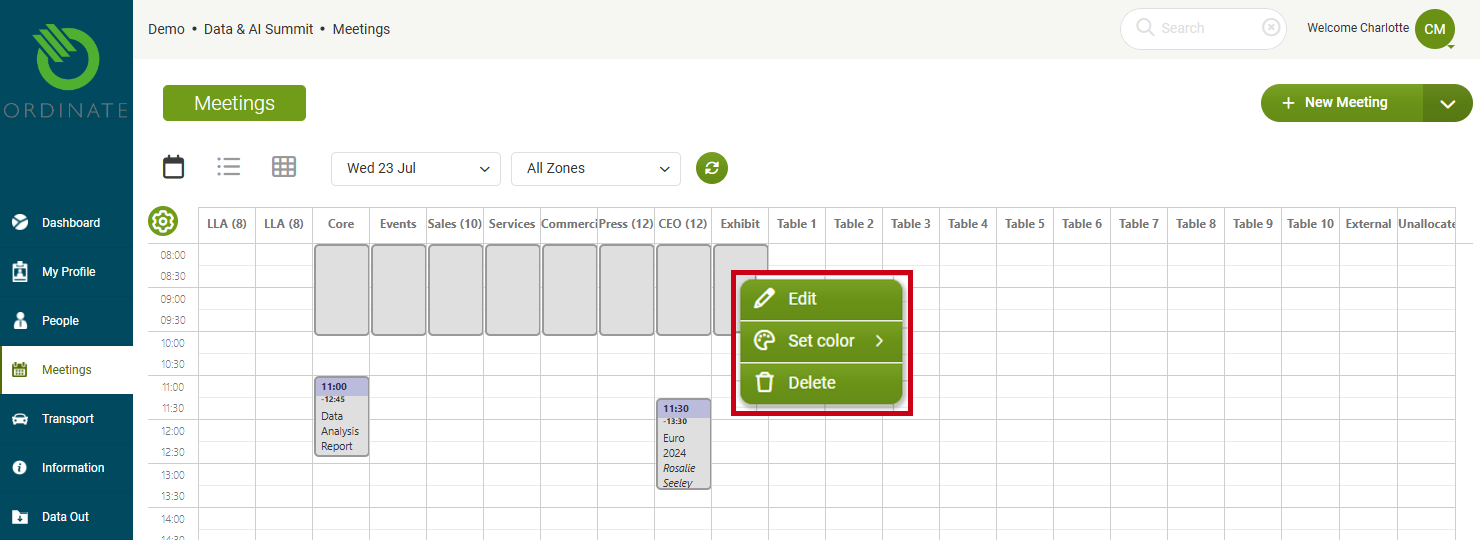
To edit or remove a block:
- Right-click on the blocked space in the calendar view.
- Choose Edit to modify the time or space, or Delete to remove the block entirely.
- You can also use Set Color to change the block’s appearance, helping differentiate blocks visually on the calendar.
(Screenshot placeholder: Right-click options for blocked space)
Limitations and Considerations
- A block cannot be created if there is already a meeting scheduled in the space.
- Blocks only affect fixed meeting spaces; they cannot be applied to the Unallocated or External columns.
- Meetings can still be requested in event times even when all fixed spaces are blocked.
- To block out multiple spaces, you must create a separate block for each individual meeting space.