Zones & Floorplans
Ordinate helps you manage meeting spaces (locations) by organizing them into zones and displaying them on floorplans. These tools allow you to group spaces by proximity and visualize room availability, making it easier to manage your event.
Zones
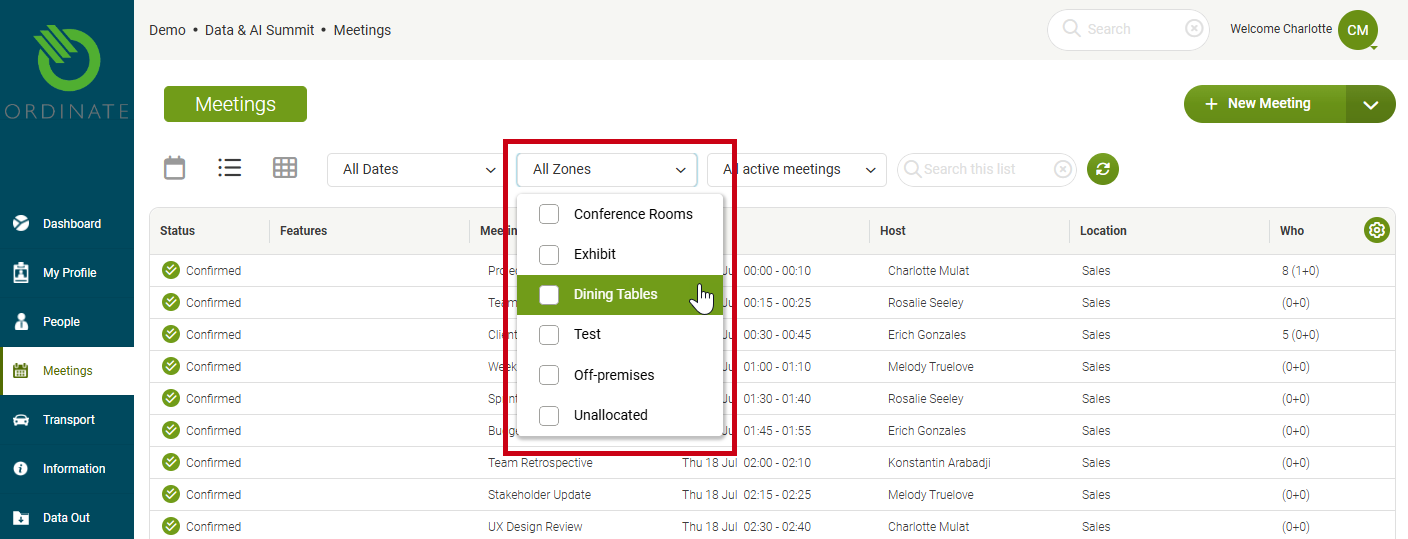
A Zone is a logical grouping of meeting spaces that are physically close to each other. For example, you may have a zone for conference rooms and another for dining tables, depending on the layout of your event space.
- Each meeting space must belong to one (and only one) zone.
- Zones are useful for filtering the calendar view. You can choose to display meetings by zone, narrowing down which spaces are shown in both list and calendar views.
Example use cases for zones:
- Grouping rooms on the same floor or area of your venue.
- Separating different types of spaces, such as formal meeting rooms versus informal lounge areas.
(Screenshot placeholder: Example of filtering meetings by zone in the calendar view)
Floorplans
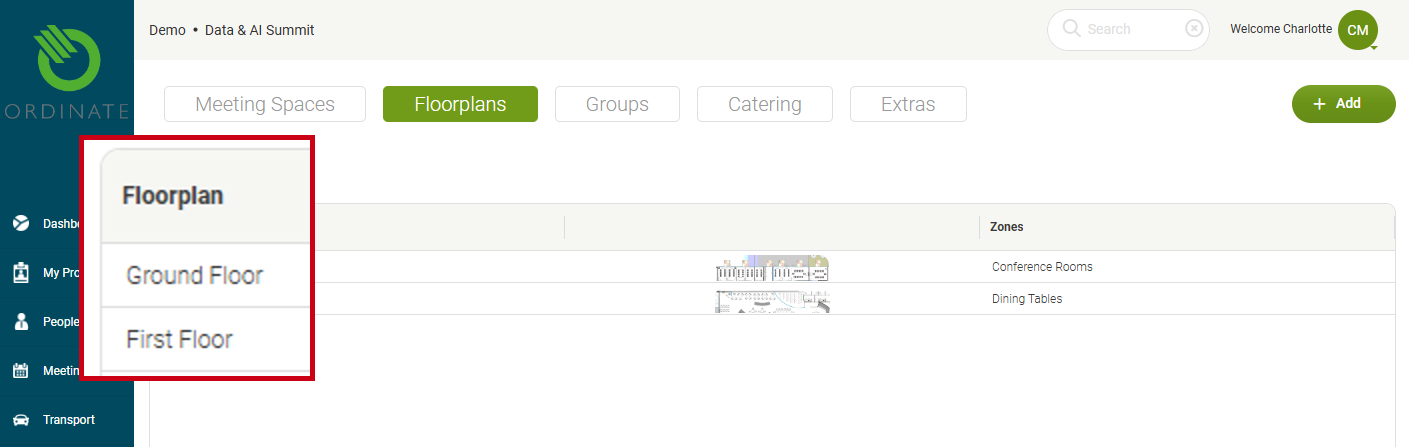
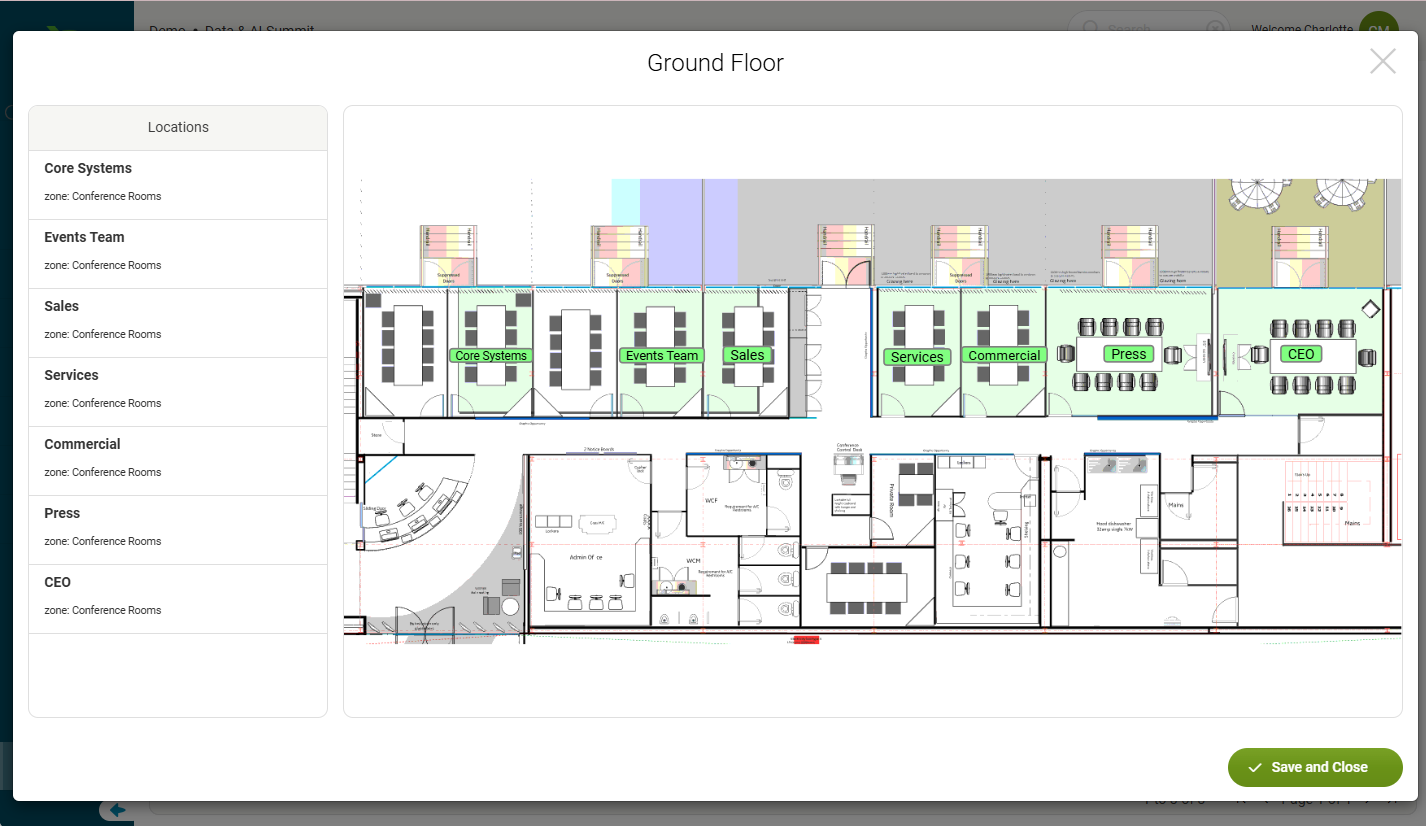
A Floorplan in Ordinate refers to an image that displays the layout of rooms and furniture within your event space. Floorplans allow you to visualize meeting spaces and easily track which areas are available or occupied.
- Floorplans are optional but can be highly useful when managing large or complex event spaces.
- If your event takes place across multiple levels, you can upload separate floorplans for each floor. For example, "First Floor" or "Terrace."
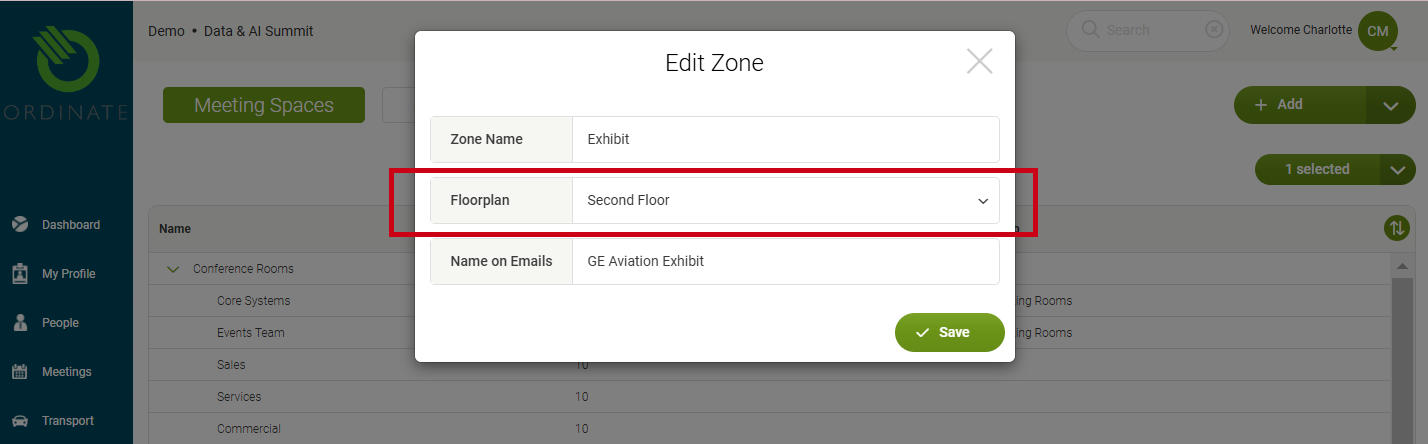
- Zones can be assigned to floorplans, but a single zone cannot span more than one floorplan. If you have rooms in the same zone but on different floors, you'll need separate zones for each floorplan.
(Screenshot placeholder: Example of a floorplan with zones highlighted)
Uploading and Configuring Floorplans
To upload and manage floorplans in Ordinate, follow these steps:
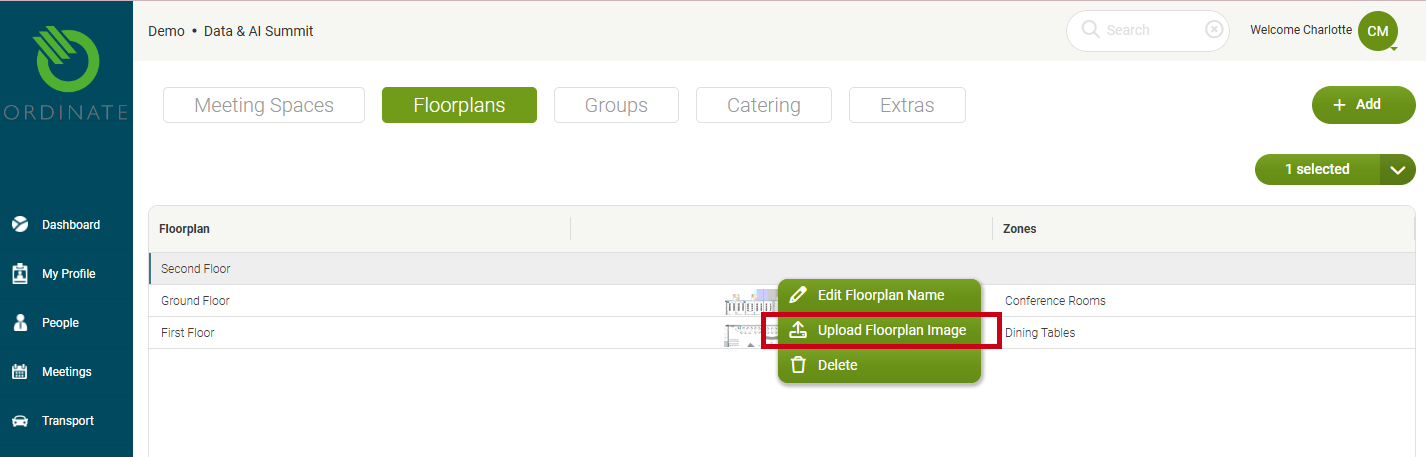
- Go to Settings > This Event > Meetings > Floorplans.
- Click +Add and provide a name for your floorplan, such as "First Floor" or "Main Hall."
- Once the floorplan is added to the list, right-click on it and choose Upload Floorplan Image. Supported file formats are PNG or GIF (JPG and PDF are not accepted due to lack of transparency support).
- After uploading, assign zones to the floorplan to connect it with your meeting locations. Go to the Zones tab and edit the zone to assign it to a floorplan.
Warning
PDF and JPG formats are not accepted for floorplans, as they don't support transparency.
(Screenshot placeholder: Uploading a floorplan and assigning zones)
Uploading a Floorplan
Assigning Zones
Positioning Spaces on a Floorplan
Once the floorplan is uploaded and zones are assigned, you can position each meeting space visually on the floorplan. This allows users to see which rooms or areas are booked at any given time, providing a visual overview of space availability.
- Right-click on the floorplan in the list, and choose Position on Floorplan.
- You will see your floorplan with the locations from all zones allocated to this floorplan on the left. Click each location in turn, then drag a rectangle on the floorplan to position it. You can move or resize the rectangle as required.
(Screenshot placeholder: Configuring and positioning rooms on a floorplan)
Floorplan file format and tips
Read more about how creating the best floorplan format here.